
One of the most adaptable outdoor paving materials on the market is stamped concrete. Other names for stamped concrete are textured concrete and embossed concrete.
A variety of patterns are conceivable, many of which successfully imitate other common building materials like wood, tile, stone, flagstone, slate, and brick. Natural pavement materials or plain poured concrete are lovely and with careful preparation, you can produce a variety of styles and choose the ideal one for the project.
Timing is everything when stamping newly poured concrete. The texture won’t be defined if the concrete is stamped when it is too soft since it won’t sustain the weight of the workers. When concrete is excessively hard, it will be difficult to stamp and the texture won’t stick.
In this article, we will be providing you with the step-by-step procedure of how to stamp concrete:
Prepare The Surface And Pour The Concrete
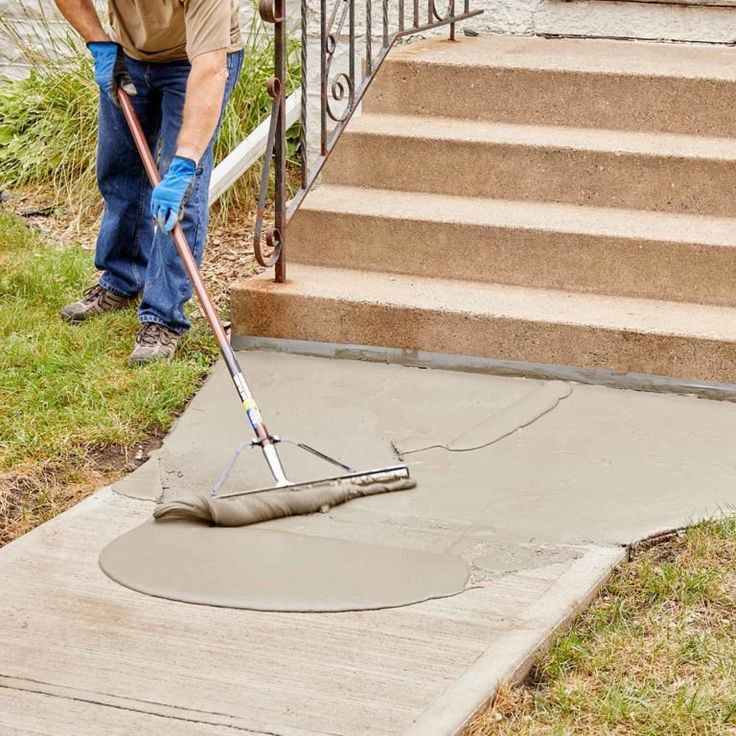
Source: Pinterest
As it directly impacts the functionality and longevity of the future stamped pavement, the floor on which the new concrete is to be poured must be in a neat condition. Remove all obstructions such as leaves or stones. After the substrate has been prepared, pour the concrete evenly. To strengthen the concrete, add polypropylene fibers.
However, concrete pouring on the surface or floor must stop if any of the following situations arise:
- If temperatures are expected to fall below 0°C over the first 48 hours.
- If the ambient temperature is more than 30°C or the concrete’s temperature is below 10°C.
- If the wind is too strong, a situation that can lead to the surface drying off.
A minimum of four inches should be present in the thickness of the concrete. Use a trowel or leveling equipment to smooth or level the concrete floor.
Use Color Hardener
The color hardener should be manually applied to the surface after it has been leveled and has reached the proper stage of plasticity. It helps to strengthen the concrete’s surface.
Throw the color hardener onto the surface from the waist level or a little lower to reduce the quantity of material that drifts into the air. A tool known as a bull float is used to float it to the surface. If you want to avoid the accumulation of color hardener, you need to work from the middle of the slab and back toward the edge.
Although this step is not necessary. Color hardener can be skipped if you intend to use concrete stains or dyes.
Apply The Releasing Agent
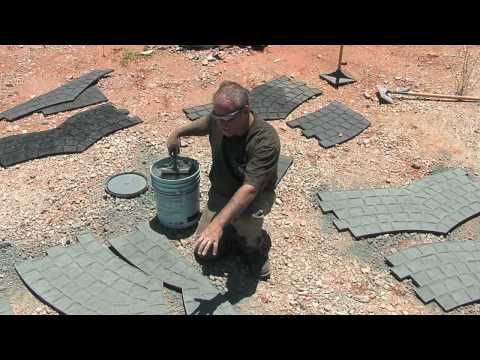
Source: Pinterest
Think of a release agent as being similar to non-stick cooking spray in that it prevents rubber stamping mats from clinging to the concrete. It is readily available in both powder and liquid forms and needs to be used right before stamping. The two basic functions of powdered or liquid release agents are:
- They serve as a bond breaker to stop stamping mats or skins from adhering to the concrete and altering the texture of the imprint.
- Provide a modest color contrast.
The release agent should be used as the slab gets close to the best set for texturing. A consistent layer of release should be present between the concrete and the texture mats; it should be thick enough to stop wet concrete from penetrating the mat but thin enough to preserve the texture detail.
The ideal tool for applying a powdered release agent is an 8-inch-wide Tampico brush while for the liquid release agent, use a pump-type sprayer. If feasible, add the color a day or two in advance if you intend to employ a tinted liquid release agent.
Check The Plasticity of Concrete
Test the concrete to check whether it is ready. Stamping early won’t make the concrete sturdy enough to withstand the weight or maintain a well-defined imprint during usage. However, if you wait too long before you begin stamping, you’ll have to exert more effort and produce little to no texture with the stamps. The majority of contractors examine whether it will sustain their weight and give a great effect by applying a fingerprint or one stamp which shouldn’t move or bury itself too deeply in the ground.
In general, stamping can start once you make a clear imprint that is between 1/4 inches deep. Aligning the first row of stamps on a straight line is crucial or else, the other rows will be out of alignment. Always use a string line as a guide when aligning stamp designs that are square or rectangular.
Set The First Stamp Row In Position
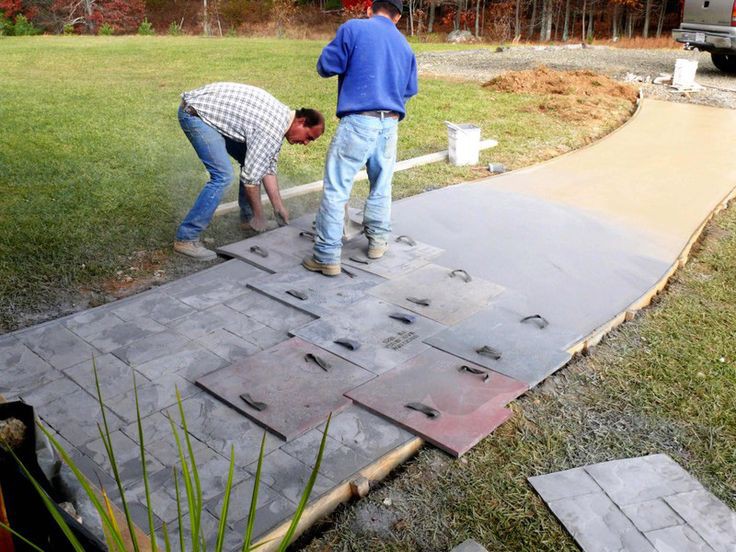
Source: Pinterest
Start at the area of the slab that was first poured and place one or two rows of stamps there. Given that it establishes the overall project’s design, the initial row needs to be laid out straight; and to guarantee that the texture is imparted, the installers will stand on top of the mats. The procedure is occasionally referred to as “leapfrogging.”
For the finishing and stamping processes, it is recommended to work row by row from the beginning to the end. The majority of stamp sets have a letter or number on the label. Position it in the manufacturer’s suggested order, such as A, B, C, or 1, 2, 3.
Add More Stamps
Since most contractors don’t have enough stamps to cover a complete patio or driveway, they usually remove previously-placed stamps and reposition them to keep the pattern going.
Perform the Last Touch
As long as the concrete is not allowed to harden, blurred pattern lines or cement paste that accumulates between joints may typically be simply repaired. You can detail with a roller, texture skin, or a hand chisel.
With the majority of stamp patterns, detailing the same day will get better results, either before leaving for the day or while the stamps are being progressed.
Remove The Releasing Agent and Apply The Curing Compound
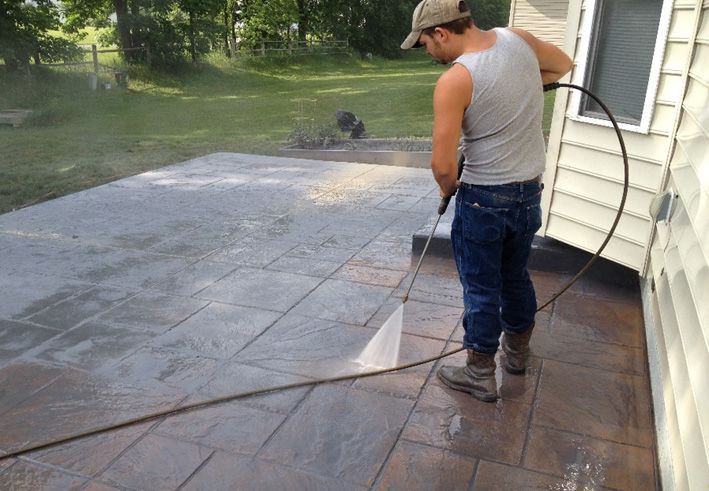
Source: Pinterest
Depending on the weather, wait two or three days to wash off the residual release agent and apply a curing compound. A high-pressure washer with a suggested pressure of 3000 PSI can be used to clean the release agent on the concrete’s surface.
Applying a cure and seal or liquid membrane-forming curing compound to the surface after it has been fully cleaned and dried will help retain moisture inside the concrete. However, make sure to verify the curing times suggested by the release manufacturer.
Install Joints
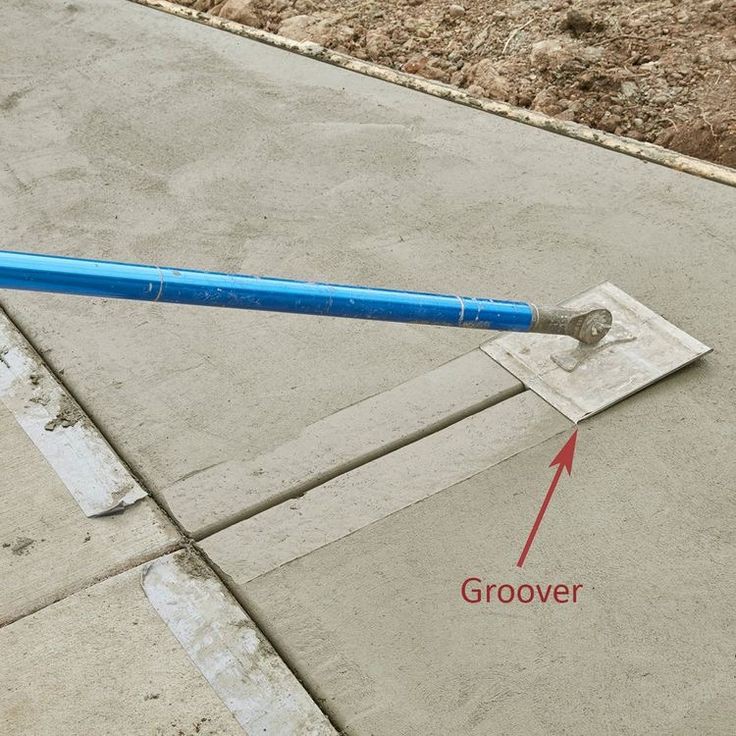
Source: Pinterest
Using a groover, you can create joints in the concrete as it starts to harden, or you can use a saw with a diamond or abrasive blade also.
Contraction joints relieve stress where it is intended and prevent unplanned random cracking.
Seal The Concrete
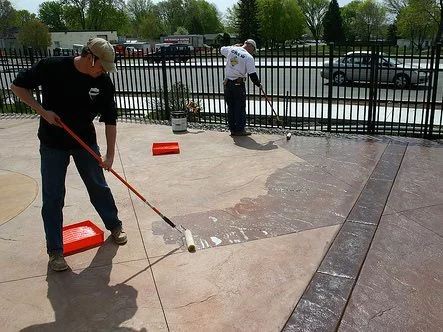
Source: Pinterest
Your concrete should be shielded from stains and other issues with a sealer. Typically, a sealer is used a few weeks after stamping to ensure that the concrete is fully ready. Applying the sealant too thickly runs the risk of trapping moisture in the slab, so exercise caution.
Combining the spraying and rolling methods is one of the most efficient methods to apply a sealer, especially when the stamped pattern has extensive grout lines. When necessary, go over the surface again with a roller to help spread the sealant evenly.
Ideally, stamping concrete takes a few weeks but the bulk of the job is done in a few days. Depending on weather and other factors, make sure to ask your contractor how long it will take you before you start using your new walkway or driveway.
Frequently Asked Questions
Where Can Stamped Concrete Be Applied?
Stamped concrete has diverse uses and may be put on almost any surface. Here are some of its most typical applications:
Pavements, Shopping malls, Garages, Courtyards, Entrances to homes, Terraces, Porches, Parking lots, Houses, Stairs, etc.
How Thick Should Concrete Be Before Stamping?
Four inches. The minimum slab size is four inches. Although you could examine the need for six inches of concrete before the job begins in some circumstances.
What Happens If I Don’t Seal My Stamped Concrete?
If not sealed, the colors will deteriorate, watermarks could become an issue, and stains could penetrate and leave dirty oil spots. Simply put, the project won’t last without a quality sealer.